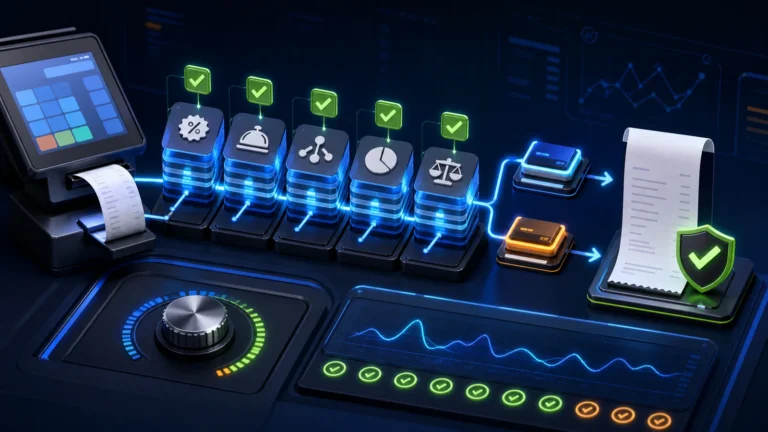

Back up the complete old system, identify exactly which records must move, clean duplicates, import a small test sample, verify stock and balances, test real sales and returns, train users, choose a low-risk cutover time and keep the old system available in read-only form until the new records have been reconciled.
Why POS migrations fail
Most migration problems do not begin with the new software. They begin with incomplete exports, duplicate products, inconsistent units, unverified opening stock or unclear responsibility. A vendor may successfully import a file while the business still loses accuracy because the source data was never reconciled.
A safe migration therefore has three separate objectives:
- Preserve the original records and evidence.
- Prepare clean opening data for the new system.
- Prove that staff can complete daily operations before the final switch.
Do not close the old POS, cancel its hosting or delete its database merely because the new login screen is ready.
Step 1: define what must be migrated
Not every historical record needs to become an editable transaction in the new system. Moving unnecessary years of data can increase cost and errors. Decide which information is operationally required and which can remain in an archived, searchable export.
| Data area | Common migration decision | Verification method |
|---|---|---|
| Products and services | Usually migrate active items, codes, barcodes, units, prices and tax settings. | Compare total active records and test representative items. |
| Opening stock | Import the verified quantity by branch, warehouse and unit. | Physical count and signed opening-stock report. |
| Customers and suppliers | Migrate active parties with correct names, contacts and identifiers. | Duplicate review and sample confirmation. |
| Receivables and payables | Import approved opening balances, not unverified totals. | Customer and supplier ageing comparison. |
| Historical invoices | May be imported, summarized or retained in a read-only archive. | Confirm legal, audit and operational requirements. |
| Users and permissions | Create new individual accounts based on current responsibilities. | Role and access testing. |
| Loyalty or membership data | Move only when balances and identifiers can be verified. | Sample customer comparison. |
Create a written migration scope before anyone starts editing files. This prevents a late request such as “also bring all old purchase returns” from changing the project during go-live week.
Step 2: take more than one backup
A backup should include the database, uploaded files, invoice attachments, product images, custom reports and configuration information where available. A spreadsheet export is useful, but it may not contain everything required to reproduce the old system.
Use separate copies rather than storing the only backup on the same computer that runs the POS. Record the date, system version and person responsible. Where the software vendor controls the server, request a formal export or backup before the subscription ends.
A practical backup set may include:
- A complete database or vendor backup.
- CSV or Excel exports of products, stock, customers, suppliers and balances.
- PDF copies of important reports at the cutover date.
- A list of users, branches, counters, printers and integrations.
- Screenshots of important settings that cannot be exported.
Step 3: clean product and party records
Moving poor data into a new system only makes the new reports look cleaner while remaining inaccurate. Before import, identify duplicate barcodes, blank names, inactive products, inconsistent units and old customer accounts.
Product cleanup checks
- Each active item has one clear name and unique code.
- Barcodes are not shared accidentally by different products.
- Purchase and sale units are defined correctly.
- Pack, carton, kilogram, gram, litre and piece conversions are documented.
- Cost and sale prices are reviewed.
- Categories and brands are useful rather than duplicated by spelling.
- Tax or regulatory fields are reviewed where applicable.
Customer and supplier cleanup checks
- Duplicate names and phone numbers are merged carefully.
- Outstanding balances belong to the correct party.
- Inactive accounts are archived rather than deleted without review.
- CNIC, NTN or other identifiers are stored only where required and protected appropriately.
Step 4: freeze and verify opening stock
Opening stock is one of the most sensitive parts of a POS migration. The old system quantity, physical quantity and new opening quantity may differ because of unposted purchases, returns, damaged items or unit-conversion errors.
Choose a stock-count date and control transactions during the count. For larger businesses, count by category or branch and use signed variance reports. Resolve material differences before importing the opening balance.
For multiple branches, never import one combined quantity unless the new system is intentionally using one shared location. Each branch or warehouse needs its own verified opening stock.
Step 5: reconcile financial balances
Customer receivables, supplier payables, cash accounts and opening ledgers should be approved by the responsible manager or accountant. A migration should not silently convert unexplained differences into opening balances.
Keep a reconciliation sheet showing:
- Old system total.
- Approved adjustments.
- New system opening total.
- Reason for every difference.
- Name and date of approval.
When accounting is handled in another system, decide which application is the official source for balances and how POS transactions will be transferred after launch.
Step 6: perform a test import
Do not begin with the full database. Import a representative sample containing simple and difficult records: products with multiple units, duplicate-looking names, opening balances, barcodes and branch stock.
The test should answer these questions:
- Are names, codes and Urdu or special characters displayed correctly?
- Are units and conversions working as expected?
- Do prices, costs and opening quantities match the approved file?
- Can users search products quickly at the counter?
- Do customer and supplier balances appear in the correct direction?
- Can the imported data be corrected safely if a mapping is wrong?
After approval, repeat the process with the full cleaned dataset using the same documented mapping.
Step 7: test complete business scenarios
A successful import does not prove the POS is ready. Staff should test real workflows from beginning to end.
- Cash and credit sales.
- Discounts requiring approval.
- Sale returns and exchanges.
- Purchases and purchase returns.
- Stock transfers between locations.
- Damaged, expired or adjusted stock.
- Customer payments and supplier payments.
- Cashier opening and closing.
- Thermal invoices, barcodes and label printing.
- Daily sales, stock and profit reports.
Where FBR, PRA or another regulatory integration applies, validate the current business registration, branch or POS identifiers, invoice mapping and response handling separately. Do not assume the previous integration settings can simply be copied.
Step 8: prepare hardware and connectivity
Migration day can fail because of a printer driver, scanner, network cable or power issue rather than the database. Test every counter with the exact hardware and invoice format that will be used live.
Check computers, tablets, barcode scanners, thermal printers, label printers, cash drawers, routers, UPS devices and internet backup. For cloud systems, document what staff should do during an internet interruption. For local systems, confirm server access, local-network reliability and backup responsibility.
Step 9: train users by role
Cashiers do not need the same training as managers, purchasing staff or administrators. Role-based training is faster and reduces accidental access.
Each user should practice:
- Logging in with an individual account.
- Completing normal daily tasks.
- Correcting an error through the approved process.
- Escalating discounts, refunds or unusual cases.
- Closing the shift and checking the report.
- Reporting a software or hardware problem.
Keep one trained internal person responsible for first-level questions during the initial days.
Step 10: choose a controlled cutover
Avoid changing systems during a peak sale, major promotion, month-end rush or public holiday. Select a low-volume period and communicate the cutover time to all branches.
A practical cutover sequence is:
- Stop new entries in the old system at the agreed time.
- Take the final backup and closing reports.
- Export transactions or balances created after the test migration.
- Import and verify the final opening data.
- Complete a short live-readiness test at every counter.
- Authorize the new system for billing.
- Keep the old system read-only for reference.
Should you run both systems in parallel?
A short parallel period can reduce risk for complex operations, but entering every transaction twice can also create staff confusion. A better approach may be a controlled pilot at one counter or branch while the old system remains available for reference.
The correct method depends on transaction volume, branch structure, regulatory requirements and the reliability of the migration tools. Define which system is the official source during the pilot.
Post-launch verification
Review the first day, first week and first month instead of assuming go-live ends the project.
- Compare daily sales with cash and payment collections.
- Review negative stock and unusual adjustments.
- Confirm purchases and supplier balances.
- Check customer balances and ageing.
- Review refunds, discounts and deleted or voided transactions.
- Confirm backups are running and can be accessed.
- Record user questions and improve training or configuration.
Questions to ask the new POS provider
- Which data can be imported automatically?
- What format and field mapping are required?
- Who cleans and approves the data?
- Can historical invoices remain searchable?
- How are branches, warehouses and opening stock handled?
- Can the business export its data later?
- What backup and restoration procedures are included?
- How are migration errors corrected?
- What training and go-live support are included?
- Which work is charged separately?
POS migration checklist
Frequently asked questions
Can all old POS data be moved?
It depends on export access, database structure and the new system’s import tools. Products, parties, stock and opening balances are commonly migrated. Full transaction history may require custom work or may be retained as a read-only archive.
Should the old POS be deleted after migration?
No. Preserve a backup and, where possible, read-only access until the business has completed reconciliation and met its record-retention requirements.
How long does a POS migration take?
The timeline depends on data volume, cleanliness, branches, hardware, integrations and staff availability. A responsible provider should review the data before confirming the schedule.
Can NexZion Solutions help migrate from another POS?
NexZion Solutions can review the available exports, required opening data, branches and workflows before confirming what can be migrated and which work requires additional preparation.
Plan your POS migration before switching
Review NexZion POS, request a demonstration and share a sample export so the migration scope can be evaluated before go-live.
Explore NexZion POS · Request a POS demo · Book software consultation
NexZion Solutions publishes practical guides based on business-software, compliance-workflow, website and automation implementation experience in Pakistan.